12.18.24 By Bridgenext Salesforce Team

In the modern era of software development, the ability to deliver high-quality applications swiftly and reliably is more important than ever. As businesses increasingly embrace cloud technologies and agile methodologies, the need for robust deployment processes has become a top priority. Continuous Integration and Continuous Deployment (CI/CD) pipelines are central to this transformation, enabling development teams to automate their build, test, and deployment processes efficiently.
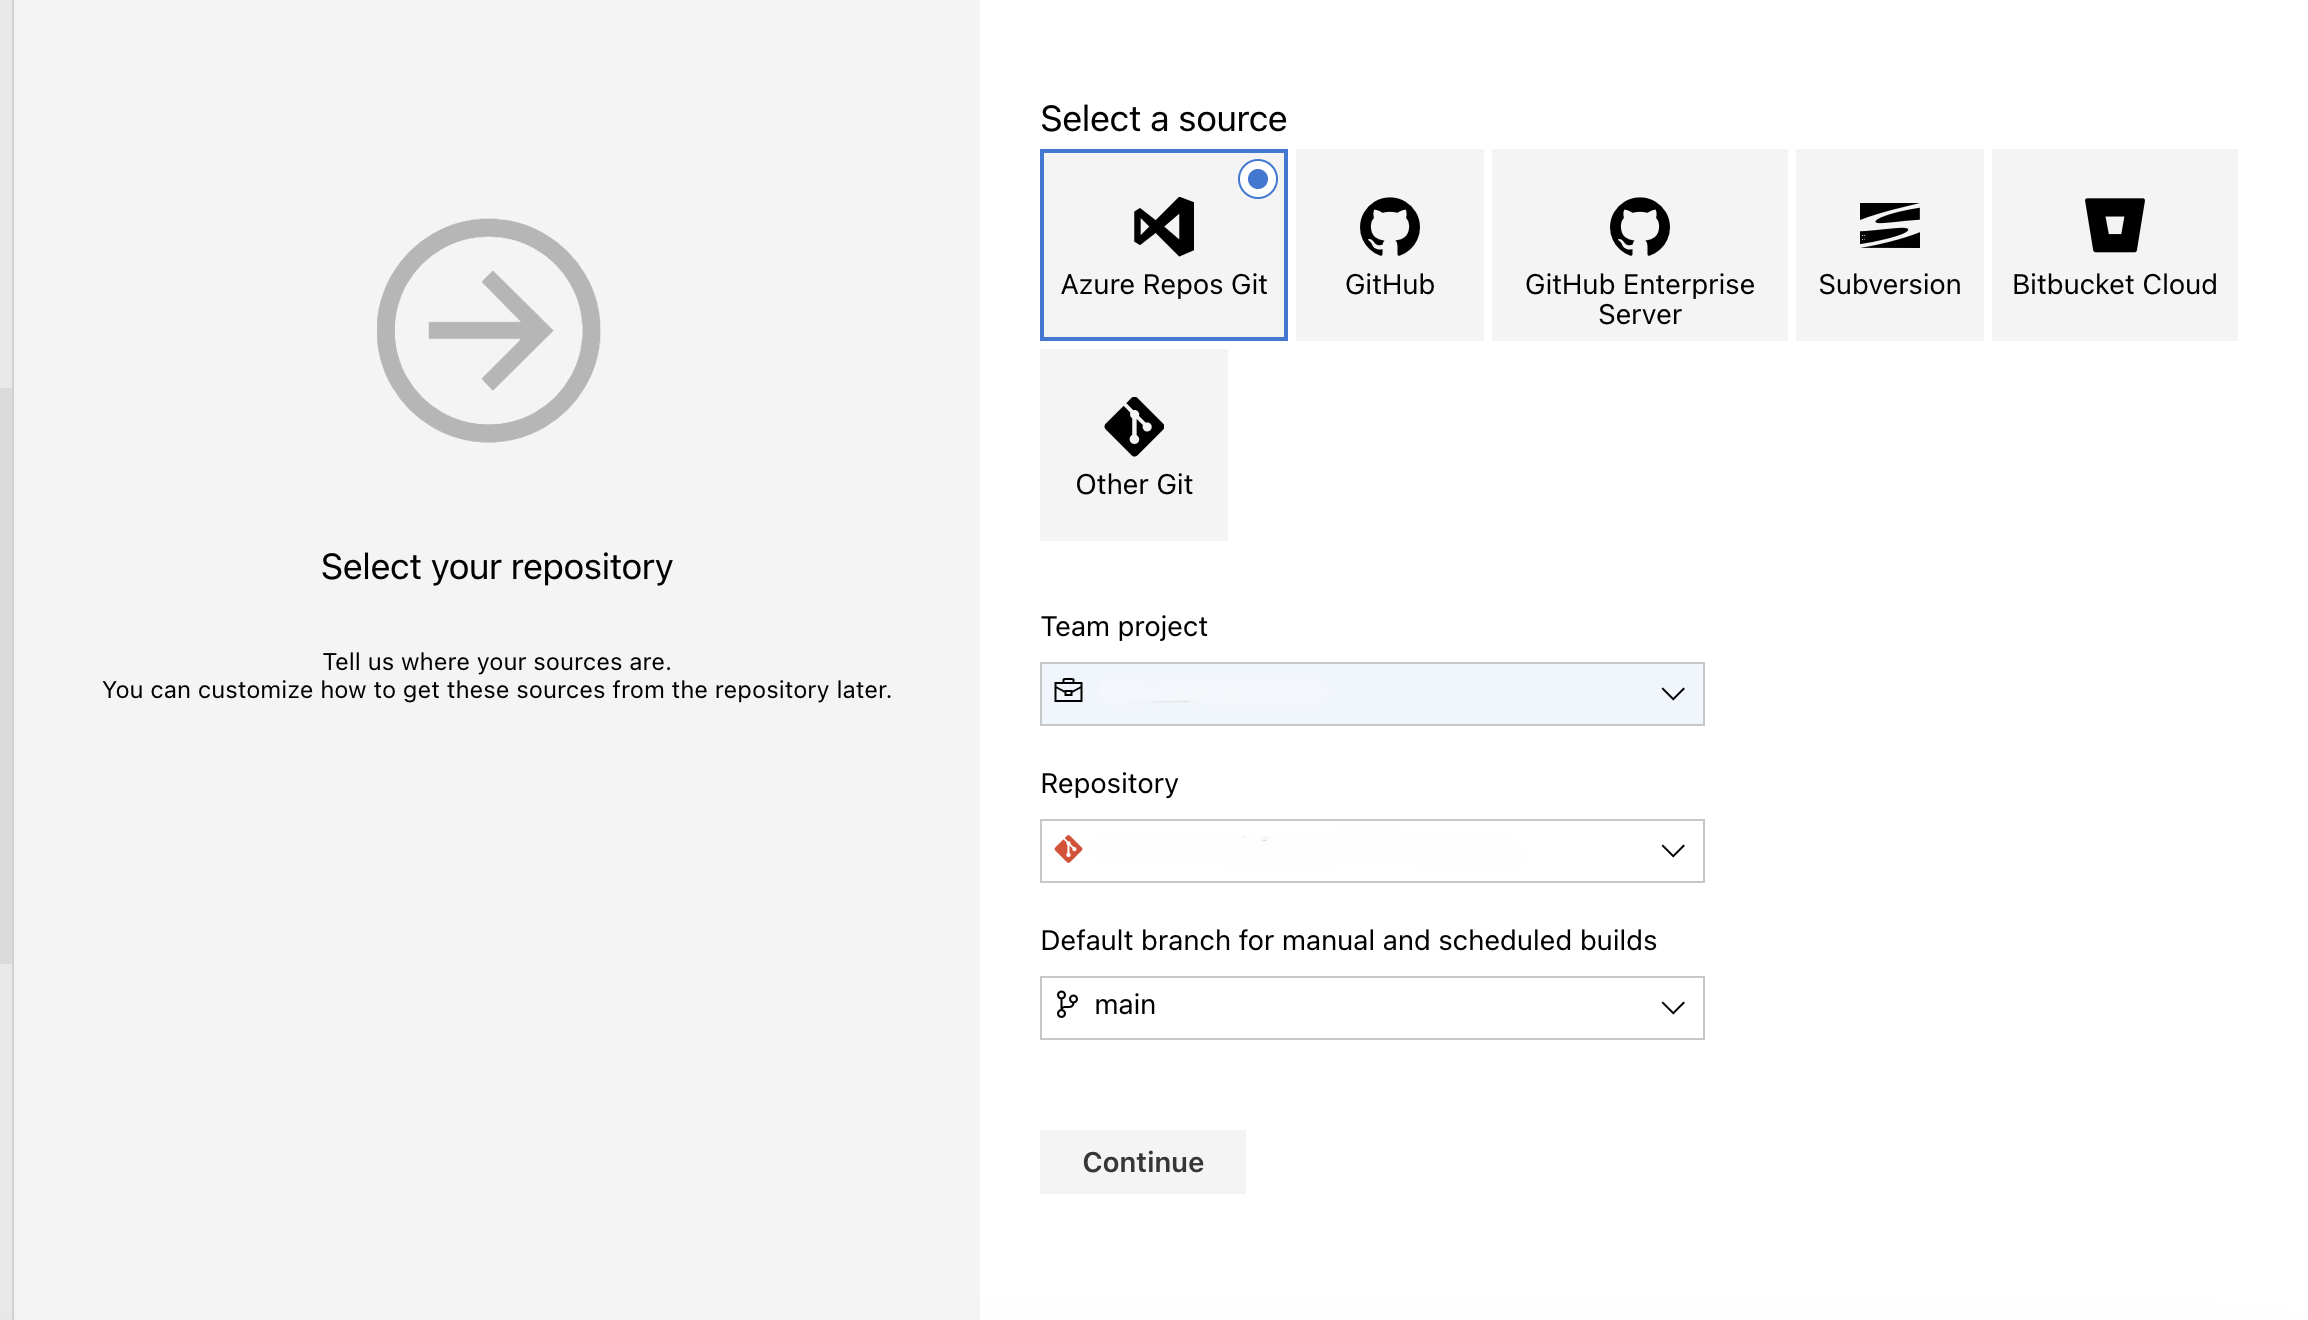
Azure DevOps, with its comprehensive suite of tools, stands out as one of the leading solutions for managing these pipelines effectively. When it comes to Salesforce development, particularly with the adoption of second-generation managed packages (2GP), the benefits of a well-designed CI/CD pipeline become even more apparent. By implementing a CI/CD pipeline using Azure DevOps, you can streamline your development processes, reduce manual errors, and ensure a smoother deployment experience.
So, are you ready to streamline the process of publishing second-generation managed packages on Salesforce, achieve greater efficiency, reduce manual errors, and deliver higher-quality applications with confidence? Let’s embark on a journey to unlock the powerful capabilities of Azure DevOps and second-generation managed packages for your development needs.
Read our blog to learn how to set up an Azure CI/CD pipeline specifically for publishing second-generation managed packages in Salesforce. We will delve into the steps required to integrate Azure DevOps into your development workflow, showcasing how to automate the various stages of your Salesforce application lifecycle—from initial code commits to final production releases.
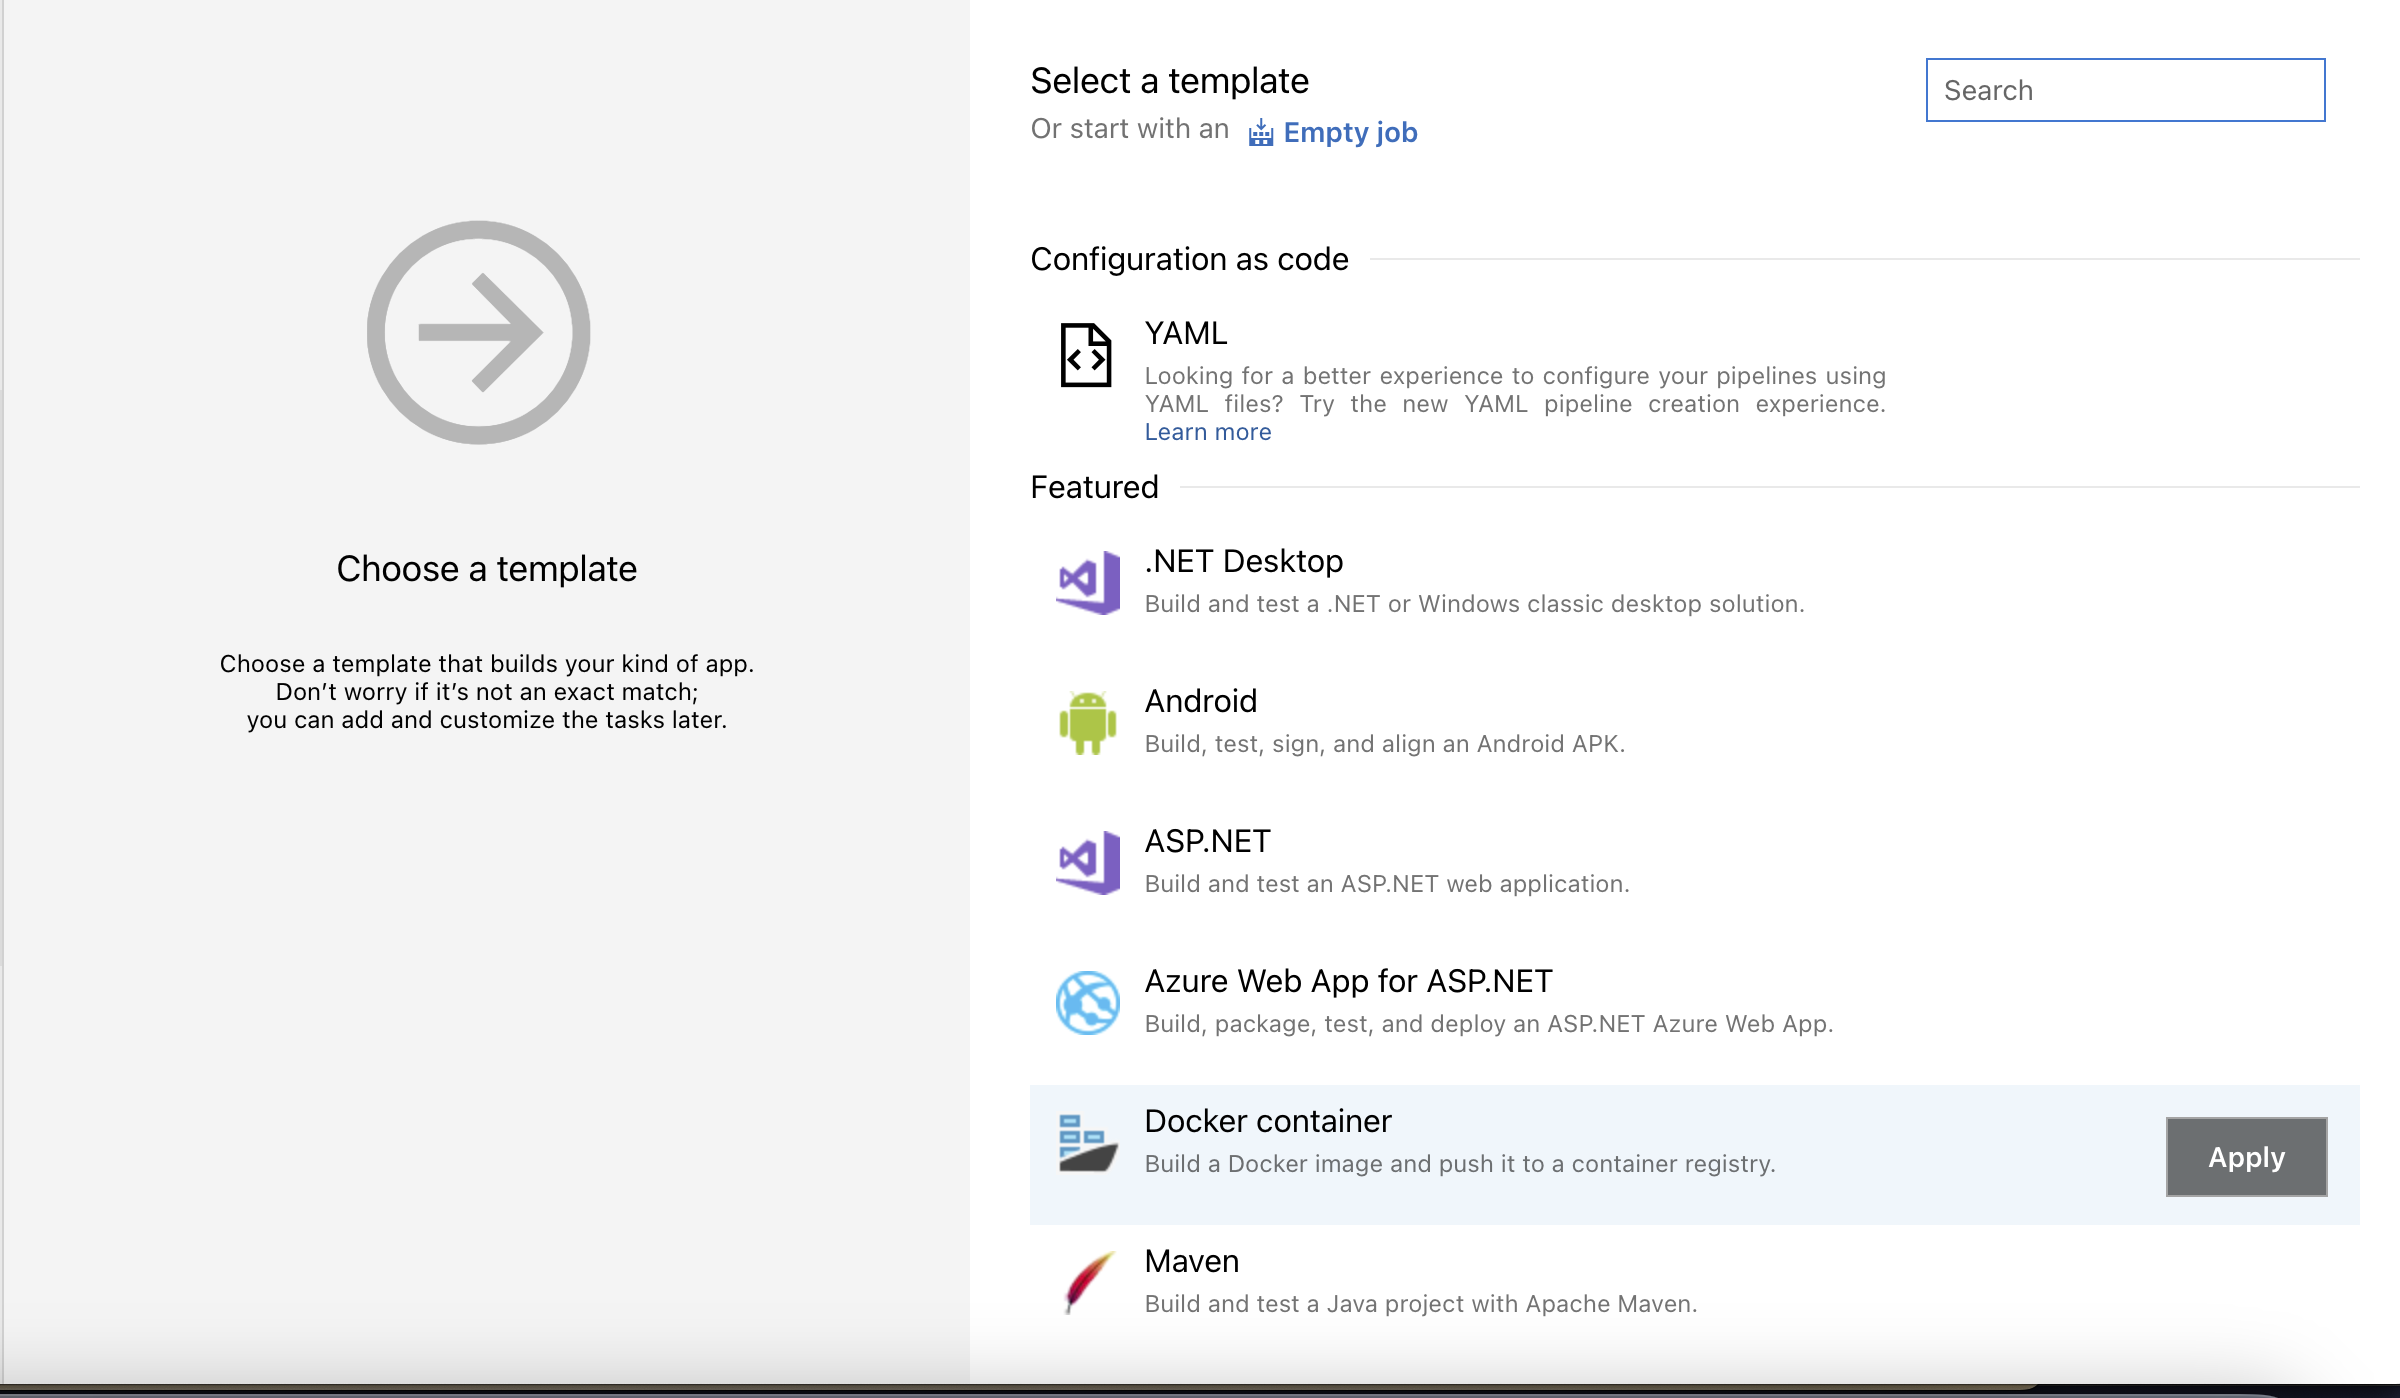
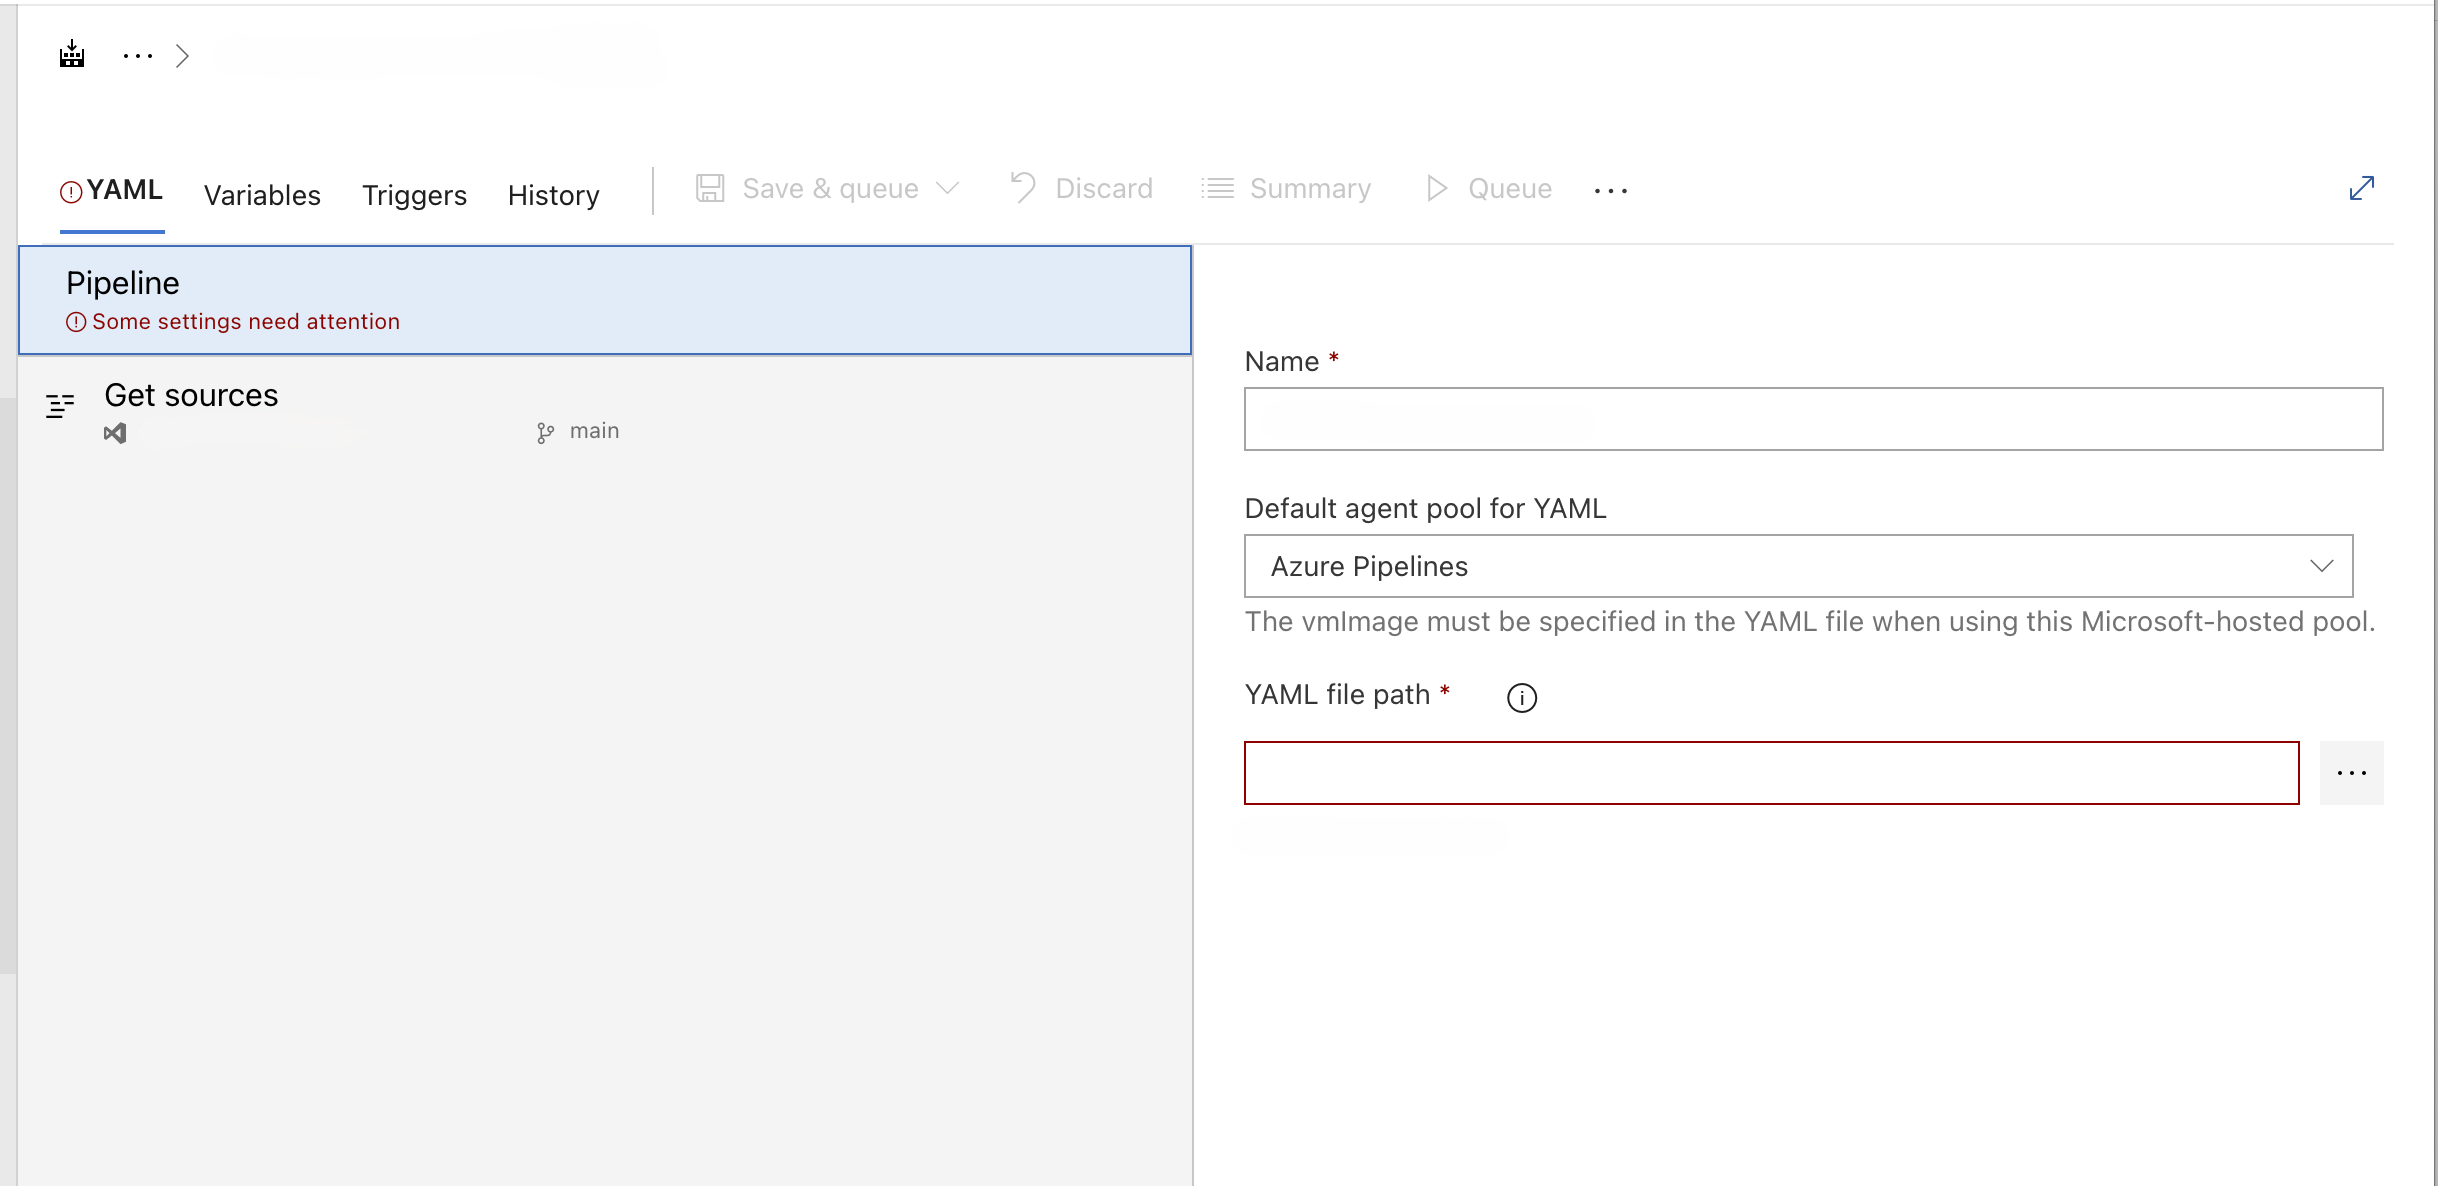
Before we dive into the details of setting up an Azure CI/CD pipeline for Salesforce second-generation managed packages, there are a few prerequisites that need to be in place. Here’s what you’ll need to get started:
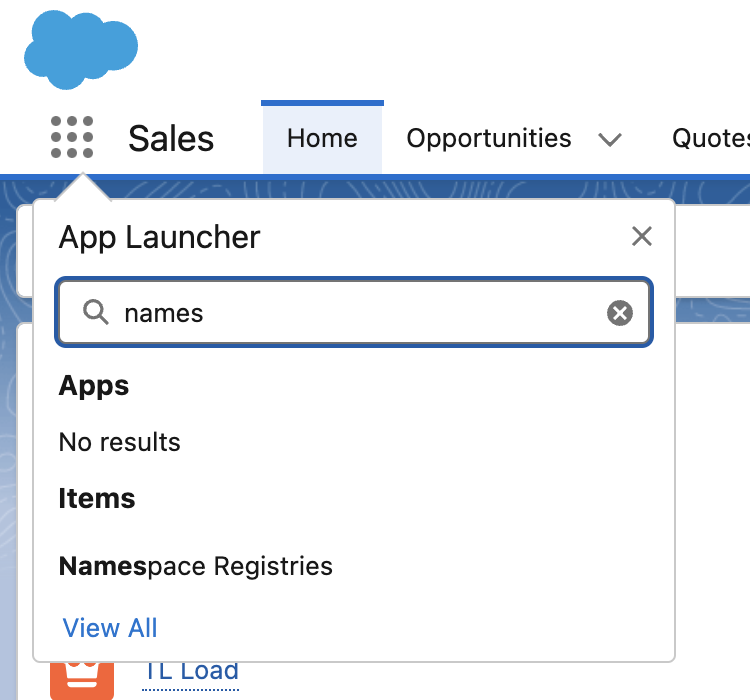
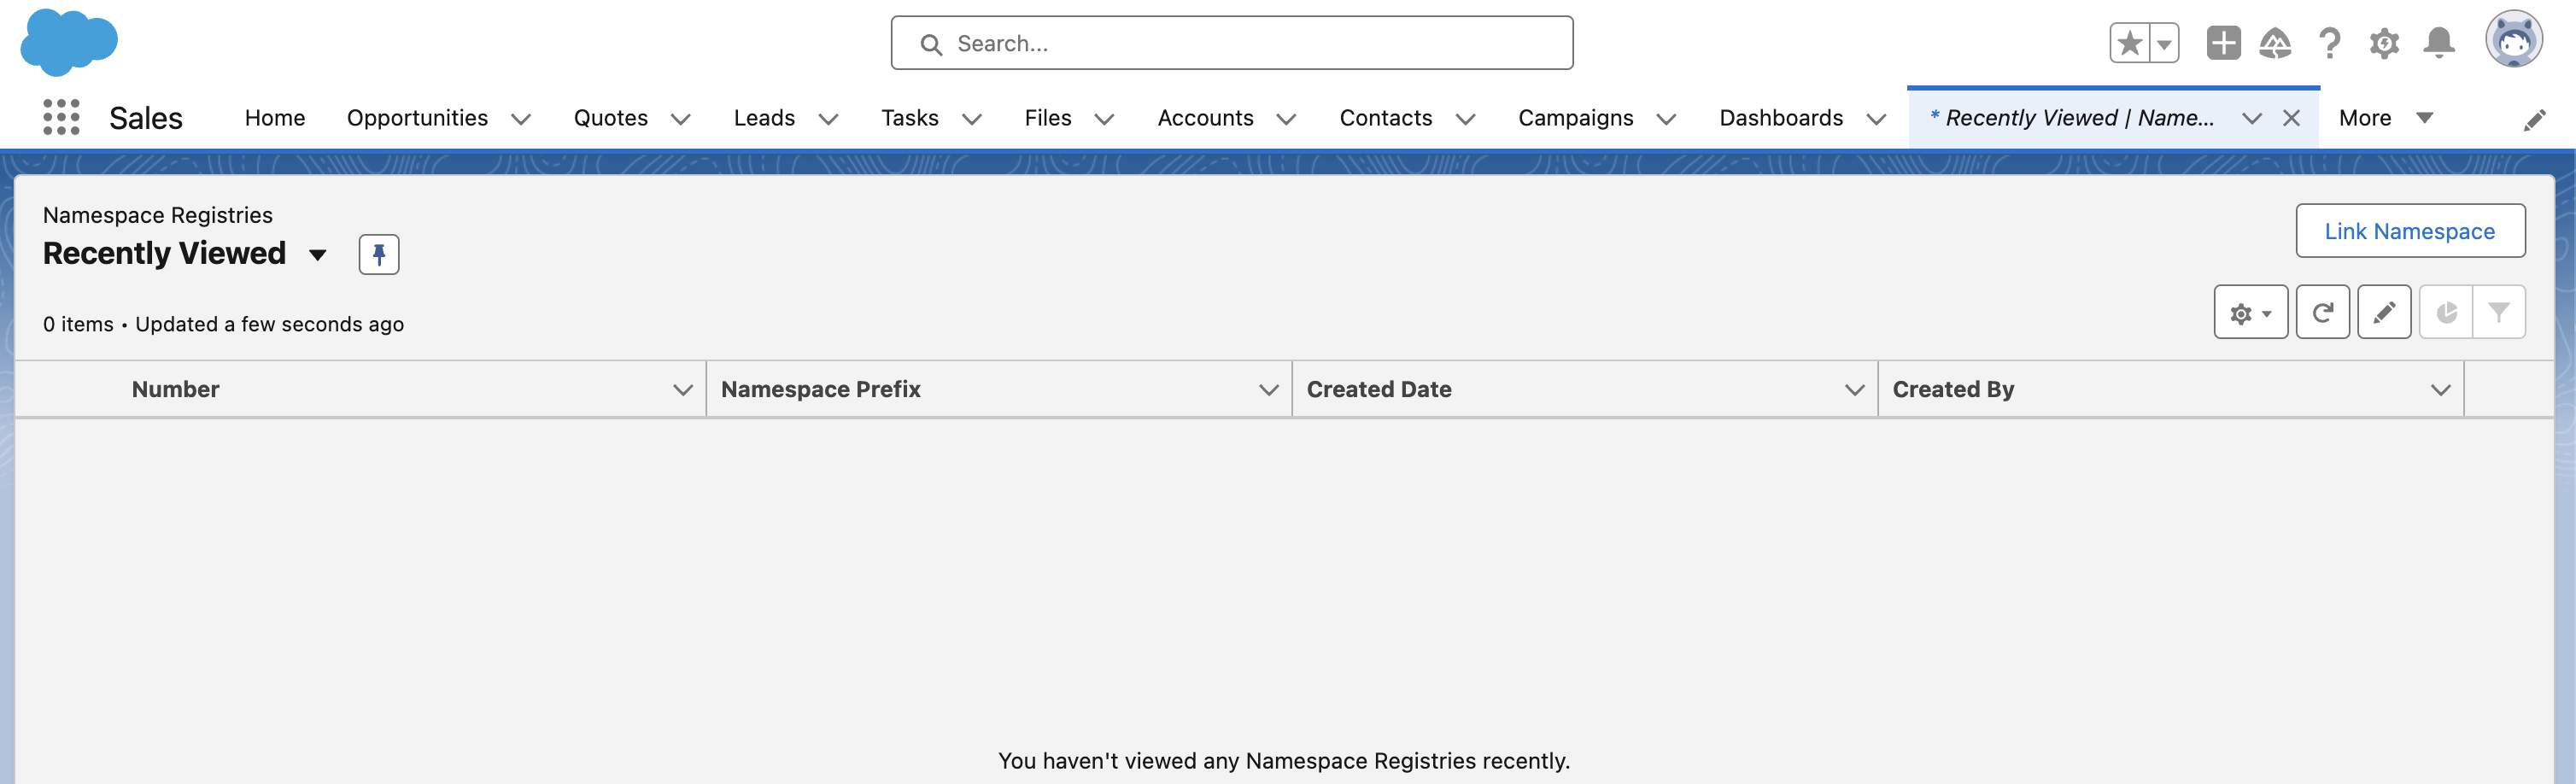
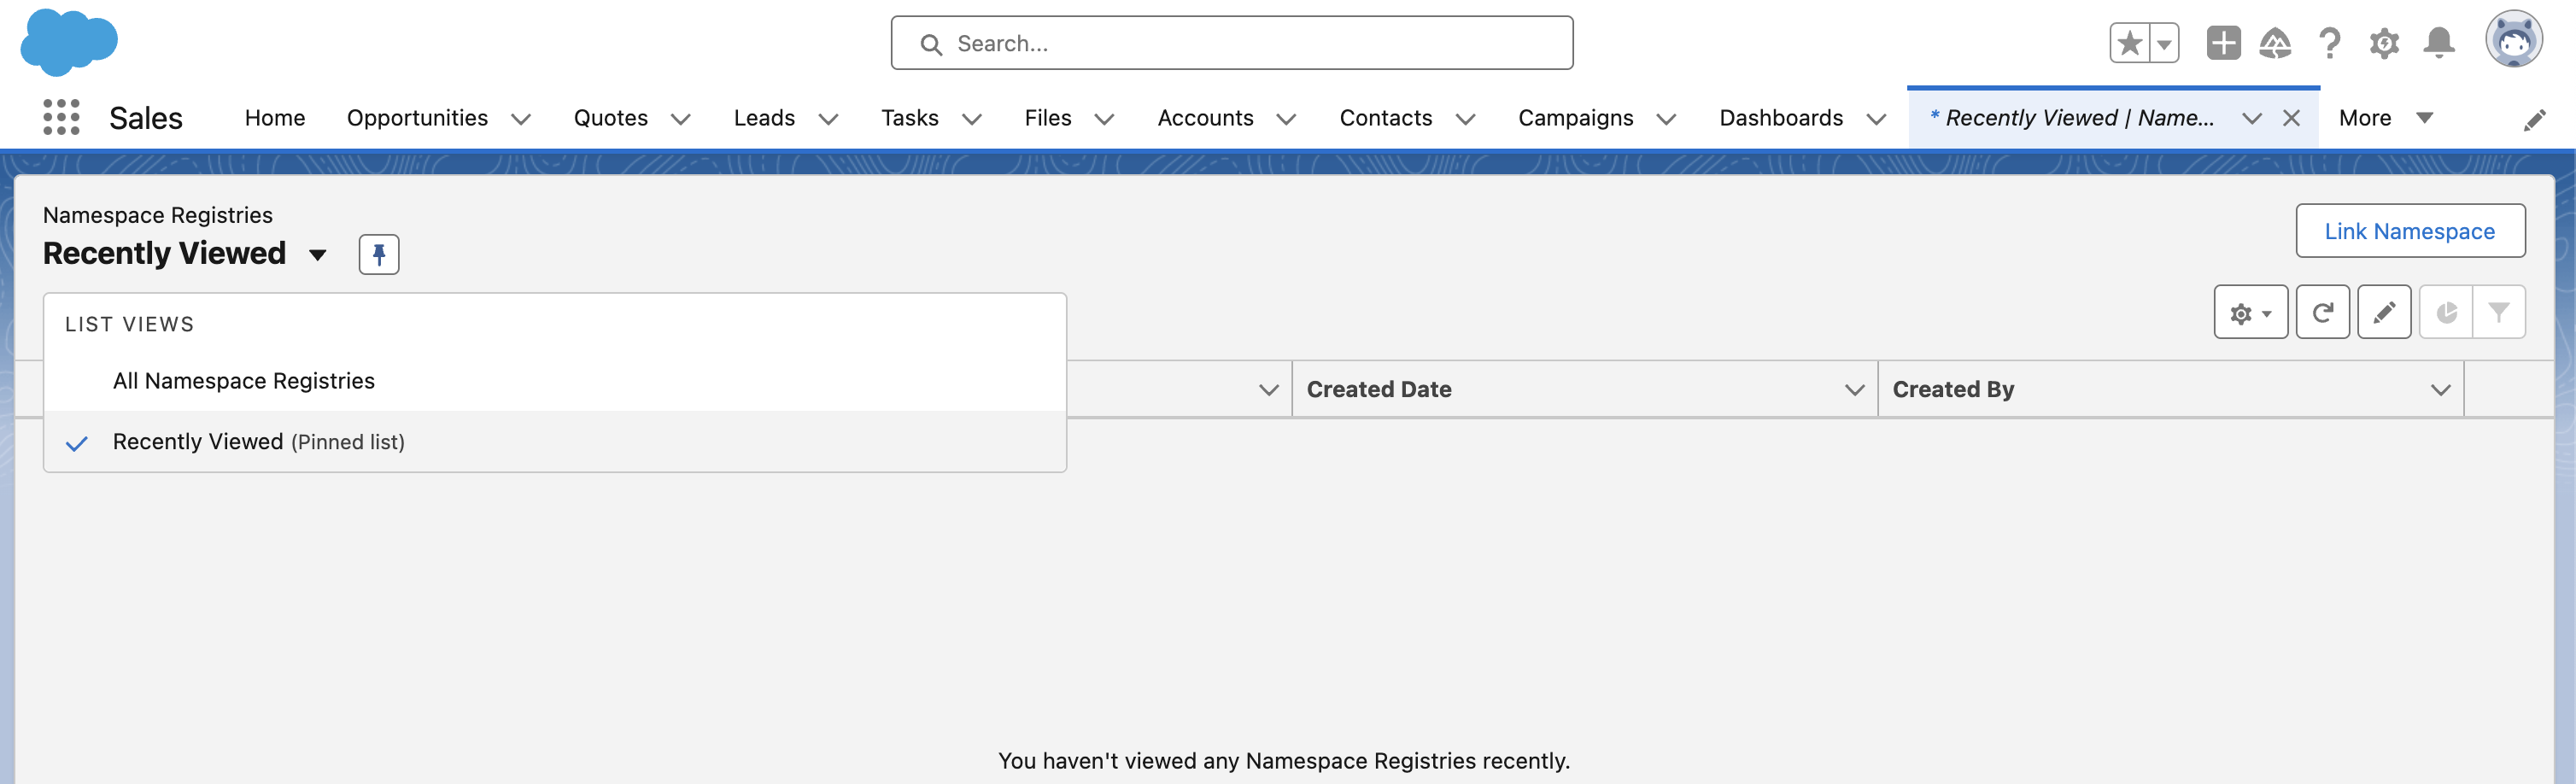
Before you can create second-generation managed packages in Salesforce, you need to link a namespace to your Dev Hub org. A namespace is a unique identifier that distinguishes your package from others in the Salesforce ecosystem. By linking a namespace to your Dev Hub org, you establish a naming convention for your packages and components, ensuring that they are uniquely identified and can be distributed across different orgs seamlessly.
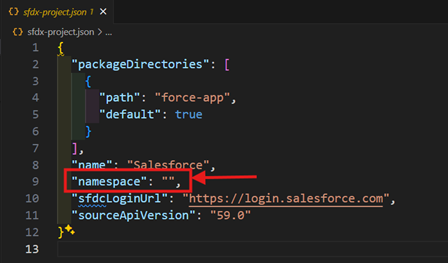
A Salesforce DX project has a specific structure and a configuration file (sfdx-project.json) that identifies the directory as a Salesforce DX project.
This command generates the necessary configuration files and directories to get you started.
Follow the instructions to log in and authorize Dev Hub.
Follow the prompts to log in and authorize the Development Org.
Before creating your scratch org, you might need to set up some pre-configurations. This includes defining features like namespaces, enabling specific Salesforce features, and setting custom fields. Update your project-scratch-def.json file with these configurations.
Adjust these settings based on your project requirements. Refer to Salesforce documentation for additional options you might need.
Before committing your code to the Azure DevOps repository, you need to ensure that all required metadata is included in your manifest/package.xml file. You can do this manually or use the Salesforce Package.xml Generator Extension for VS Code.
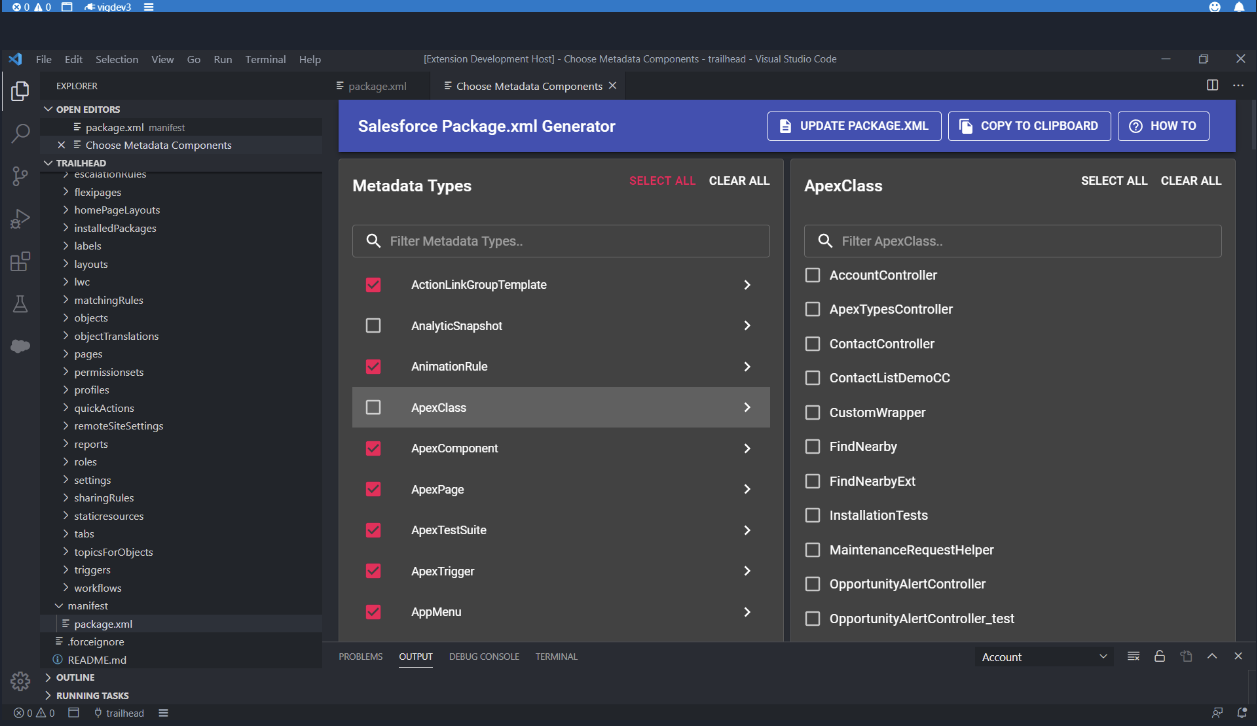
Ensure that you include all the metadata components required for your managed package.
To ensure your local project is in sync with the Salesforce org, retrieve the source metadata using Salesforce CLI.
This command pulls the metadata from your Salesforce org into your local project directory.
This step is needed to generate a private key (server.key) and a self-signed certificate (server.crt) that will be used for authentication in the CI/CD pipeline.
Follow steps mentioned in the Salesforce documentation to Create a Private Key and Self-Signed Digital Certificate.
Follow this guide for detailed steps to create a connected app in salesforce.
server.key and upload the private key generated earlier. 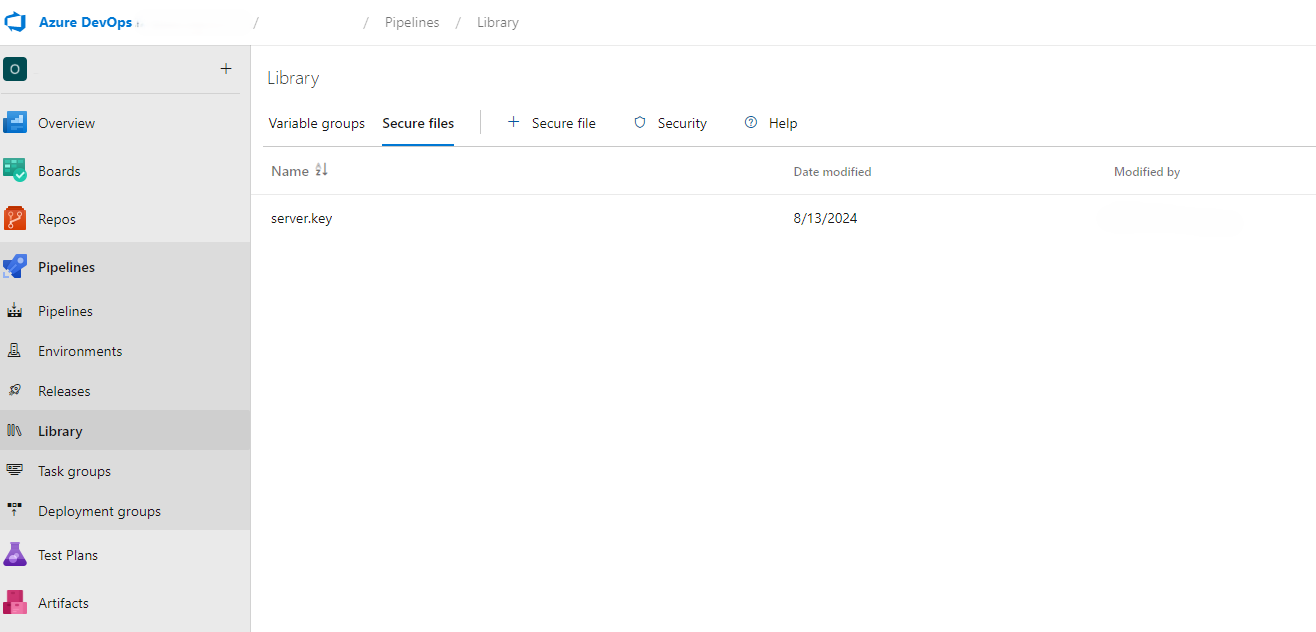
      trigger:
      - main

      pool:
        vmImage: 'ubuntu-latest'

      variables:
        - template: .\variables\variables.yaml

      jobs:
      - job: SalesforcePackageCreation
        displayName: 'Salesforce Managed Package Creation
        steps:
        - checkout: self

        - task: DownloadSecureFile@1
          name: jwtKey
          inputs:
            secureFile: 'server.key'

        - task: UseNode@1
          inputs:
            version: '20.x'
          displayName: 'Install Node.js'

        - bash: npm install @salesforce/cli --global
          displayName: 'Install Salesforce CLI'

        - script: |
            echo "Installing jq"
            sudo apt-get update
            sudo apt-get install -y jq
          displayName: 'Install jq'

        - script: |
            echo "Authenticating to Dev Hub"
            sf org login jwt \
            --username DEV_HUB_Username \
            --jwt-key-file $(jwtKey.secureFilePath) \
            --client-id $(CONSUMER_KEY) \
            --alias $(DEV_HUB_ORG_ALIAS) \
            --set-default-dev-hub
          displayName: 'Authenticate to Dev Hub'

        - script: |
            echo "Creating Scratch Org"
            sf org create scratch \
              --set-default \
              --target-dev-hub $(DEV_HUB_ORG_ALIAS) \
              --definition-file config/project-scratch-def.json \
              --alias $(SCRATCH_ORG_ALIAS) \
              --duration-days 3
            echo "Scratch Org created"
          displayName: 'Create Scratch Org'

        - script: |
            echo "Pushing Source to Scratch Org"
            sf project deploy start --source-dir force-app --target-org $(SCRATCH_ORG_ALIAS)
          displayName: 'Push Source to Scratch Org'

        - script: |
            echo "Running Tests on Scratch Org"
            sf apex run test \
              --target-org $(SCRATCH_ORG_ALIAS) \
              --synchronous \
              --code-coverage \
              --detailed-coverage \
              --result-format human > result.txt
          displayName: 'Run Apex Tests on Scratch Org'

        - script: |
            echo "Deleting Scratch Org"
            sf org delete scratch \
              --target-org $(SCRATCH_ORG_ALIAS) \
              --no-prompt
          displayName: 'Delete Scratch Org'
          condition: always()

        - script: |
            echo "Creating 2nd Generation Package"
            PACKAGE_LIST=$(sf package list --target-dev-hub $(DEV_HUB_ORG_ALIAS))
            echo "Available packages: $PACKAGE_LIST"
            if echo "$PACKAGE_LIST" | grep -q "$(PACKAGE_NAME)"; then
              echo "Package $(PACKAGE_NAME) exists. No action required."
            else
              echo "$(PACKAGE_NAME) does not exist, running sf package create"
              sf package create \
                --name $(PACKAGE_NAME) \
                --path force-app \
                --package-type Managed \
                --target-dev-hub $(DEV_HUB_ORG_ALIAS)
            fi
          displayName: 'Create 2nd Generation Package'

        - script: |
            echo "Creating package version"
            OUTPUT=$(sf package version create \
              --package $(PACKAGE_NAME) \
              --installation-key-bypass \
              --wait 10 \
              --target-dev-hub $(DEV_HUB_ORG_ALIAS) \
              --code-coverage \
              --definition-file config/project-scratch-def.json \
              --version-number $(VERSION_NUMBER) \
              --version-name "$(VERSION_NAME)" \
              --version-description "$(VERSION_DESCRIPTION)" \
              --tag "$(TAG)" \
              --verbose \
              --json)

            if [ $? -ne 0 ]; then
              echo "Failed to create package version. Command output:"
              echo "$OUTPUT"
              exit 1
            fi

            PACKAGE_VERSION_ID=$(echo "$OUTPUT" | jq -r '.result.SubscriberPackageVersionId')

            if [ -z "$PACKAGE_VERSION_ID" ]; then
              echo "Package Version ID is null or empty. Command output:"
              echo "$OUTPUT"
              exit 1
            fi

            echo "Package Version ID: $PACKAGE_VERSION_ID"
            echo "##vso[task.setvariable variable=PACKAGE_VERSION_ID]$PACKAGE_VERSION_ID"
          displayName: 'Create Package Version'
          condition: succeeded()

        - script: |
            if [ "$PROMOTE_PACKAGE" = "true" ]; then
              echo "Promoting Package Version"
              echo "Publishing Package with Version ID: $(PACKAGE_VERSION_ID)"
              sf package version promote \
                --package "$(PACKAGE_VERSION_ID)" \
                --target-dev-hub $(DEV_HUB_ORG_ALIAS) \
                --no-prompt
            fi
          displayName: 'Promote Package Version'
          condition: and(succeeded(), eq(variables.PROMOTE_PACKAGE, 'true'))

        - task: PublishPipelineArtifact@1
          condition: always()'
          inputs:
            targetPath: $(System.DefaultWorkingDirectory)/result.txt'
            artifactName: TestResults'
            publishLocation: pipeline'

        - task: PublishBuildArtifacts@1
          condition: succeeded()'
          inputs:
            pathtoPublish: $(Build.ArtifactStagingDirectory)'
            artifactName: deploy-artifacts'
In this section, we’ll break down each component of the YAML pipeline and explain the purpose of every step involved.
This defines which branch initiates the pipeline. In our case, the pipeline is triggered by any changes made to the main branch.
Here, we specify the virtual machine image that will run the pipeline. For this example, we’re utilizing the latest version of Ubuntu to ensure compatibility and access to updated tools.
This section is crucial for managing configuration settings. You can store sensitive information such as API keys and connection strings here, keeping them secure while allowing easy access during pipeline execution.
Jobs are the core components of the pipeline, outlining the sequence of tasks to be executed. In this example, we have a single job called SalesforcePackageCreation.
Each step represents an individual action within the job, executing specific tasks like checking out code, running scripts, or deploying to a Salesforce org. Here’s a detailed look at each step:
jq utility, which is essential for parsing JSON output generated by various scripts. project-scratch-def.json file, providing an isolated environment for development and testing. PROMOTE_PACKAGE variable is set to true, this step promotes the package version, making it available for broader use. By following this structured approach, we ensure a clear understanding of the pipeline’s operation, making it easier for you to adapt and implement in your own projects.
To make your CI/CD pipeline flexible and adaptable, store configuration variables in Azure DevOps pipeline variables. This allows you to update values without modifying the pipeline configuration file directly.


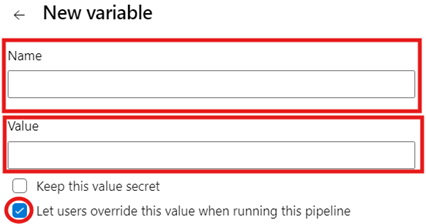
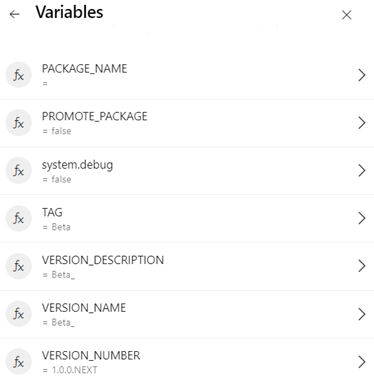
Ensure these variables are used in your pipeline YAML file for greater flexibility.
In conclusion, setting up an Azure CI/CD pipeline for publishing Salesforce second-generation managed packages can significantly enhance your development workflow and deployment processes. By automating the build, test, and deployment stages of your application lifecycle, you can achieve greater efficiency, reduce manual errors, and ensure a smoother deployment experience. Azure DevOps provides a powerful platform for managing your CI/CD pipelines, offering a comprehensive set of tools and features to streamline your development processes. By following the steps outlined in this guide, you can harness the full potential of Azure DevOps and second-generation managed packages to transform your Salesforce development experience.
Start your journey today and experience the transformative impact of CI/CD pipelines in your development projects.